Monday, September 21, 2009

Grandma's 80th Birthday Cake!

This spunky sweet lady, our beloved Grandma Liechty, my hubby's saucy grandma, had her 80th birthday this week and to celebrate I thought that she definitely deserved a cake to match the occasion and her love of life! I was excited to be able to bake my hubby's sweet grandma's cake and we were even more thrilled to eat it!The cake was a death by chocolate cake and went fast! It was awesome to see how excited grandma was and just as much fun to see everyone else's reaction, especially her great-grandkids (my ueber cute nieces and nephews) who were downing marshmallow fondant balls left and right We just loved our trip and seeing the amazing leaves beginning to change throughout Utah! Another fun event this week was finding out that my Famous Stuffed Mushroom's recipe is in the Worldwide Ward Christmas Cookbook . . . flip open the book and their it is . . . the first recipe with a gorgeous picture! A great surprise and a fun cookbook! !Chocolate Fudge Frosting

2 pound bag of powdered sugar
1/4-1/2 cup milk
1/8 to 1/4 teaspoon salt
1 teaspoon Vanilla
1/2 cup Butter
1/3 cup Shortening
7 ounces (1/2 can) Sweetened Condensed Milk
pinch of salt
1 1/2 cups Semi-sweet Chocolate Chips, or milk chocolate

Beat the butter and shortening together until smooth, add the vanilla, powder sugar, and 1/4 cup of milk (add more milk if needed). Set aside

Mix the chocolate chips, condensed milk and salt together in a microwave-safe bowl.
heat on high for 1 minute intervals, stirring after each, until chocolate is melted.
cool to room temperature before beating into buttercream. Chill frosting before using. Enjoy

This is a very rich frosting/cake filling!

Wednesday, September 9, 2009

Zucchini Kuchen

I am one who is more likely to buy a cookbook or try a recipe because I see a picture of it or see it made and it makes me want to pull on some jeans, a ball cap and a sweatshirt and run to the store at 2 in the morning to buy ingredients! I am sure we are all guilty of passing up some killer meals because they don't sound/look as appealing as others. Sadly I think this recipe may fall into the category of "greats that were passed over." This is definitely a "don't judge a book by its cover" type of cake!!! In fact it is one of the best cakes that I have ever had and I was beyond thrilled to be cleaning out my bookshelf of recipes and to have found it (especially since it was printed in German on a half sheet of paper . . . in great danger of being lost forever!) This recipe was given to me by an Italian lady that I met while serving an LDS mission in Germany. She served it to me and my missionary companion Kate (cook extraordinaire) and we asked for the recipe! One thing that really thrilled me was that it was made with olive oil . . . an ingredient that I had never had in a cake or dessert before and it makes the cake unbelievably moist and fruity. Plus the pairing with cinnamon just knocks my socks off! It really is absolutely rich, moist and delicious! I think it is a perfect treat to take on a picnic or to enjoy with a mug of hot chocolate or herbal tea! This cake also gets better the second or third day!

Zucchini Kuchen
3 Eggs
1 cup Olive Oil
2 cups Sugar
1 tsp Vanilla
2-3 small Zucchini, diced or shredded
3 cups Flour
1 tsp Backing Powder
2 tsp Cinnamon
1/2 tsp salt

Beat the 3 eggs together in a large bowl unto light and fluffy, add olive oil, vanilla and zucchini. Mix well
In a separate bowl sift together the flour, cinnamon, baking powder and salt.
Add the flour mixture to the egg mixture and mix until incorporated. (This is a THICK batter).
Pour the batter into two greased 9 inch pans and bake in a 350 degree preheated oven for an hour; cover the cake with aluminum foil for the last 1/2 hour of baking. Cool to room temperature and dust with powder sugar and/or cinnaman if you like. Enjoy!

Tuesday, September 8, 2009

Broccoli Beef

Hello everybody! Yep . . . I know that I have not posted in a while . . . and sadly I have made some mighty fine things during my little absence . . . but photographed NONE of it! I bought Dorie Greenspan's amazing Baking book and I have dreamily been turning its pages and dusting my kitchen with flour and sugar trying out some of her delicious recipes! Check out her book or her site to see what amazing concoctions she has created! For labor day I made her almost snickers treats and yes my family enjoyed them! Speaking of which I hope everyone had a wonderful Labor Day! We spent it with my lovely fam at my sweet Aunt Susan's house after watching the labor day parade. It is seriously one of my favorite days of the year! I love gathering our crew and catching up and munching on some amazing food! Thanks ya'll that came! It was fun . . . and those who weren't their . . . well you were missed but you SERIOUSLY MISSED OUT!

Broccoli Beef
1 lb Sirloin, sliced thinly across the grain
1 lb Broccoli Florets
2 tablespoons Cooking Oil
3 cloves Garlic, minced
1 1/2 teaspoon cornstarch, dissolved in 1 tablespoon water

Beef Marinade:1 1/2 teaspoon soy sauce
1 1/2 teaspoon Chinese rice wine vinegar
1 teaspoon cornstarch
1 teaspoon freshly ground black pepper

Sauce:3 Tbsp Oyster Sauce
1 1/2 tsp Rice wine vinegar
1 1/2 Tbsp Soy Sauce
1/3 cup chicken broth plus 2 tbsp
Dash of Red Pepper Flakes

1. Marinate the beef: Stir together the beef marinade ingredients in a medium bowl. Add the beef slices and stir until coated. Let stand for about 15 minutes
2. For the sauce: Stir together the sauce ingredients in a small bowl, set aside
3. Cook the broccoli in a small pot of boiling, salted water until tender-crisp, about 2-3 minutes. It should be a bright green. Drain thoroughly and set aside.
4 Heat a large frying pan or wok over high heat until a bead of water sizzles and instantly evaporates upon contact. Add the cooking oil and swirl to coat. Add the beef and immediately spread the beef out all over the surface of the wok or pan in a single layer (preferably not touching). Let the beef fry for a minute, it will begin to brown nicely. Flip the beef slices over, add the garlic to the pan and fry for an additional 30 seconds to 1 minute until no longer pink, Pour in the sauce, add the blanched broccoli and bring to a boil. Pour in the dissolved cornstarch and cook, stirring, until the sauce boils and thickens. Serve over rice. Enjoy!

This recipe freezes very well! Also I like to keep my broccoli with as much stem on as possible, so that they are long pieces. I peel the stems of the broccoli to get rid of the tough outer skin before blanching them.

Monday, August 24, 2009

Onion Petals

Hmmm . . . what to do while anxiously waiting for my next class on this lovely first day of fall semester school . . . blog something fitting for a day of fretting! Fried food!!! We actually indulged in these terribly delicious artery clogging munchies a few weeks ago and they have been patiently waiting for their appearance on The Open Pantry! I am so tempted to make more . . . but won't . . . probably won't . . . will try to avoid touching cooking oil today . . . and tomorrow . . . hopefully! We will see what my math class (!!!) and economics class drive me to do! Onion Petals
Recipe by: Emily

Large sweet onion, cut into "petals" or rings
3/4 cup Buttermilk
1 egg
1 tsp Lawry's seasoning salt
1 1/2 cups Flour
3-4 cups Cooking oil, canola, corn, peanut etc.
Salt

1. Cut the onion into petals or rings, whichever you prefer. Mix the flour and seasoning salt together in a bowl. Mix the buttermilk and egg in another and beat lightly to mix. Dredge the onion petals in the flour a couple at a time, and then coat in egg mixture. Return egged petals to the flour mixture to coat again and lightly shake off any excess flour. Place petals directly into a large pot heated to 375 degrees. Fry onions in oil until lightly browned. Remove from oil and place on a plate lined with paper towels or a paper bag. Lightly salt petals immediately after removing them from oil. Serve hot with favorite dipping sauce! Enjoy!

I served these babies with Horsey Sauce.

Wednesday, August 12, 2009

Bee Birthday Cake

I love making cakes! It is sooo much fun and so relaxing (unless you have a deadline and get to stay up until 3 or 4 in the morning . . . still learning how long some things take . . .) or if your fondant will not cooperate . . . or if it takes 10 times as long as you think it will . . . or if something happends to it during delivery . . . . but other than that it is a delight! I was super excited to find out that one of the ladies that I visiting teach is having a birthday today (!!!) so I made her a cake!The bees were fun to make and I was beyond thrilled that my marshmallow fondant was the PERFECT consistency! Oh Happy Day!!! I hope that you have a Happy Birthday Jen!!!

Tuesday, August 11, 2009

Creamy, Dreamy Peanut Butter Torte

My little sister texted me last night and said that she needed me to make a treat . . . so I complied!
This cake is super rich! It is definitely one to share with the hubby! Thankfully it was in my home for less than 24 hours so I don't have to be tempted all day by it . . . but we did of course taste it before sending it out the door . . . and it was so good!
Creamy, Dreamy Peanut Butter Torte
Recipe by: Emily

Cake layer:
1 cup All- purpose Flour
1 1/2 tsp Baking Soda
1 tsp Salt
3/4 cup Light Brown Sugar
3/4 Cup Granulated Sugar
1 stick butter, softened
1/4 cup Cocoa powder
1/4 cup Boiling water
2 large Eggs, beaten
1 tsp Vanilla
1 cup Buttermilk

In a bowl combine flour, salt and baking soda with a wire whisk, set aside. In a large bowl combine sugars and butter with an electric mixer until a grainy paste forms. In another bowl combine the boiling water and cocoa powder until smooth. Add cocoa mixture, eggs, vanilla to sugar mixture, blend until smooth. Alternately add the dry ingredients and buttermilk to cocoa batter. Blend until just combined. Bake in a 8 ir 9 inch spring form pan in a 350 degree preheated oven for 25 to 35 minutes or until a toothpick inserted into the middle comes out clean. Allow to cool in pan.

Peanut Butter Filling:
8 oz Cream Cheese, softened
14 oz can Sweetened Condensed Milk
3/4 cup Creamy Peanut Butter
2 tsp Vanilla Extract
1 cup Heavy Cream

In a large bowl beat the cream cheese until light and fluffy with an electric mixer. Beat in the condensed milk, peanut butter, and vanilla. In another bowl beat the heavy cream until soft peaks form. Fold the whipped cream into the peanut butter mixture. Pour over cooled cake.

Chocolate Ganache:1 cup Semi-sweet Chocolate chips
3/4 cup Heavy Cream

Microwave cream until bubbles form, just before it begins to boil. Add chocolate chips to the cream and allow to sit for 5 minutes before stirring. Cool chocolate to room temperature before spreading on cake.

To Assemble:
Run a knife around the edge of the cake to loosen from the cake pans edge. Remove the outer rim of the cake pan. Circle the cake edge with wax paper to help keep the cake together while setting. Replace cake pan rim to cake, circled with wax paper. Pour the peanut butter filling over the chocolate cake. Refrigerate for 15 minutes before pouring ganache over the top, spread the ganache evenly and refrigerate for at least 2 hours before serving. Enjoy!

(To make an even richer and more moist cake you can pour condensed milk over the chocolate cake layer and let it soak in.)

Wednesday, July 29, 2009

Bacon wrapped Apple and Caramelized Onion Stuffed Pork Loin Glazed with Real Maple Syrup

Mensch! We just got back from a LONG day trip up north for my hubby's work and boy do I so not feel like even looking at my kitchen! We have been nashing on treats all day that we were drawn to along the way (!!!) . . . gummi's, cookies, and salted black licorace from our little outing to Ikea, Ice Cream from "the Big Red Barn," and some Mexican Food at a hopping place in Linden (a little town in UT). It was fun but we are something beat! So here is dinner from a few days ago! Which has found a place on my top 10 list! I just love all of the things that you can do with pork loin . . . and don't even get me started on bacon! I rarely buy it because I know that my kitchen will be forever splattered with grease and that I will forever be found munching on it! But the wonders that it does wrapped around a stuffed pork loin are amazing! I paired the pork loin with spicy brown mustard roasted potatoes! They are awesome and too easy! Just cut up potatoes, toss them in a bag, add brown mustard, a little salt and pepper and then toss onto a HOT baking sheet (a hot pan keeps then from sticking) and roast until cooked through . . . delish!Bacon wrapped Apple and Caramelized Onion Stuffed Pork Loin Glazed with Real Maple Syrup
Recipe by: Emily

2.5 lb Pork Loin
1 Apple, cored, peeled, and diced
1 Medium Onion, sliced thin
8 strips of Bacon
1/4 Cup Panko bread crumbs
1 Tbsp Brown Sugar
Salt
Fresh Cracked Pepper
Real Maple Syrup

1.Preheat the oven to 375 degrees. Cook the sliced onions in a frying pan over medium heat for 20 minutes, allowing them to caramelize. Add the diced apples, brown sugar, salt and pepper. Continue cooking until the apples are soft and the mixture has caramelized. (Add a little water along the way if you need to to prevent burning and sticking.) Add the bread crumbs and mix well. Remove the apple/onion mixture from the stove and set aside.
2. Butterfly the pork loin creating an even layer. Season with salt and pepper and then spoon the onion and apple mixture into the center lengthwise. Fold one side of the pork over the filling and roll up making sure that the filling is secure. Wrap the bacon strips around the pork loin and secure with toothpicks if needed. Place in a roasting pan and drizzle with maple syrup. Roast pork loin for 30-40 minutes or until pork is cooked through. For the last few minutes of cooking turn on the broiler and crisp up the bacon, turning often to crisp the bacon on all sides. Allow the meat to rest covered with foil for 10-15 minutes before slicing. Enjoy!

Wednesday, July 22, 2009

Optimus Prime Birthday Cake . . . and some family fun!

(This little beauty = "Optimus Prime, animated Transformer Cake," kept my little sister and I up until early in the morning . . . but our cute little T-man Birthday boy was happy . . . so we were happy!)
I have been a bit of a slacker this summer about posting . . . It has been pretty busy and I have opted to spend time with my handsome husband rather than with my computer . . . Our family did have a great 24th of July celebration though!
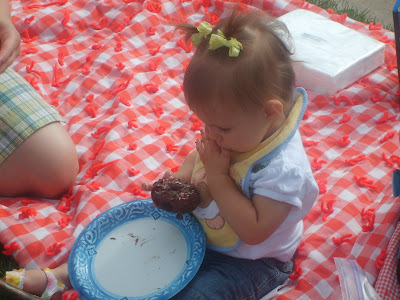
A doughnut loving cutie looking so cute chocolate coated!
Another chocolate covered happy face that enjoyed Auntie Em's homemade doughnuts for the 24th of July Celebration!
The only evidence that I spent HOURS in the kitchen making doughnuts and pastries!

Friday, July 3, 2009

German Chocolate "Schnecke" and Cheese Danish Cups

Hooray for the 4th of July!!! I absolutely LOVE celebrating the 4th! This year we are hanging out with my younger sister, her hubs, and my delicious little niece! I caught a "holiday baking bug" today and came home and started playing around in the kitchen . . . leading to the consumption of naughty goodies! (D-lish!) I came out of the kitchen telling my husband that "thank heavens we have family, friends, and neighbors to share with!" I boxed up a load for my Mutti to take with them up the mountain and hopefully they will be shared and eaten! So some of you may know what Schneke are . . . they are snails . . . well Schneke is the German word for snails . . . so whenever we made/make anything "swirly" I remember them being called Schneke from my Mission . . . kinda cute I think! German Chocolate Schnecke
Recipe by: Emily
1 Package Puff Pastry Dough, (2 sheets) thawed according to package instructions
2 cups Coconut Pecan Frosting, you can use "canned" for a short cut
1/2 cup Mini Chocolate chips

Unfold the puff pastry dough onto a lightly floured surface, spread evenly with coconut pecan frosting, sprinkle with mini chocolate chips and roll up into a log. Cut the log into 1/2 inch pieces and place on a lined baking sheet. Bake in a 375 degree preheated oven for 10-15 minutes or until pastry is lightly browned. Allow to cool and serve warm or at room temperature. Enjoy!

I have a weakness(!!!) for cheese danishes!!! I hate to say it but croissants and danishes are the two tempters for me at bakeries! I am not a doughnut girl by any means so they never worry me . . . but seeing cheese danishes is a struggle sometimes! Love' em! (Mensch!) These are great finger foods that are super fast, easy and d-lish to make!Cheese Danish Cups
Recipe by: Emily

8 oz Cream Cheese, room temperature
2 Egg Yolks, room temperature
1/3 cup Sugar
1/2 tsp Lemon Juice
1/4 tsp Salt
1 tsp Vanilla Extract
1 Package Puff Pastry Dough (2 sheets)thawed according to package instructions

1. Mix the cream cheese, sugar, egg yolks, lemon juice, salt, and vanilla together until just incorporated. (ie DON'T WHIP).
2. Roll out dough on a lightly floured surface. Cut each sheet of dough into 9 equal pieces. Place pieces in a muffin tip and gently press down into the muffin tin cups. Equally distribute the cream cheese mixture into each pastry dough "cup" and bake in a preheated 400 degree oven until puffed and golden brown. Remove immediately from cups onto a cooling rack and serve warm or at room temperature. Enjoy!
You can also drizzle the cups with icing and bake them with a a little jam or preserves on top.